From Idea to Visual: AI Image Creation in WordPress
Visual content plays a crucial role in modern WordPress websites. Whether you’re running a blog, an online magazine, or a business website, high-quality images help capture attention, convey ideas more quickly, and improve overall engagement. Thanks to AI-powered tools, creating and editing images no longer requires advanced design skills or expensive software.
In this deep dive, we’ll explore how AI image creation and editing work directly inside WordPress using Assistini. You’ll learn how the tools work, how to write effective prompts, and how to consistently deliver strong results for your posts and pages.
Why Use AI for Images in WordPress?
Traditionally, website images came from stock libraries or custom photo shoots. While these options still have their place, they can be time-consuming, costly, or restrictive. AI-generated images offer several advantages:
- Faster content creation without leaving WordPress
- Custom visuals tailored exactly to your content
- Consistent visual styles across your website
- Easy editing without graphic design expertise
Assistini brings these benefits directly into your WordPress workflow by offering two dedicated AI-powered tools: the Image Creator and the Image Editor.
Putting AI Image Tools to Work
Assistini provides two complementary tools designed for different use cases: creating new images from scratch and editing existing images with simple text instructions.
1. The Image Creator: Generate Images from Text
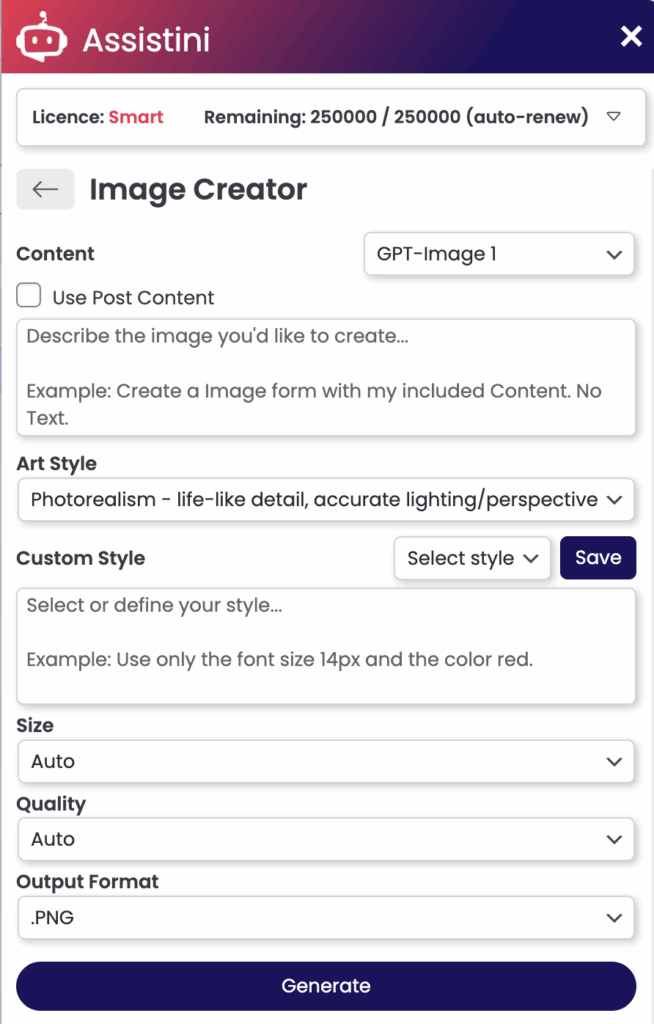
The Image Creator is designed to help you generate entirely new images for your posts and pages. You can base these images on your existing content or write a custom prompt from scratch.
Choosing the AI Engine
Assistini allows you to choose between powerful AI image engines such as GPT-Image or Gemini. Each engine has its own strengths in terms of realism, artistic interpretation, and detail rendering. Selecting the right engine can influence the final look and feel of your image.
Defining the Subject
The subject describes what should appear in the image. This can be as simple or as detailed as you like, for example:
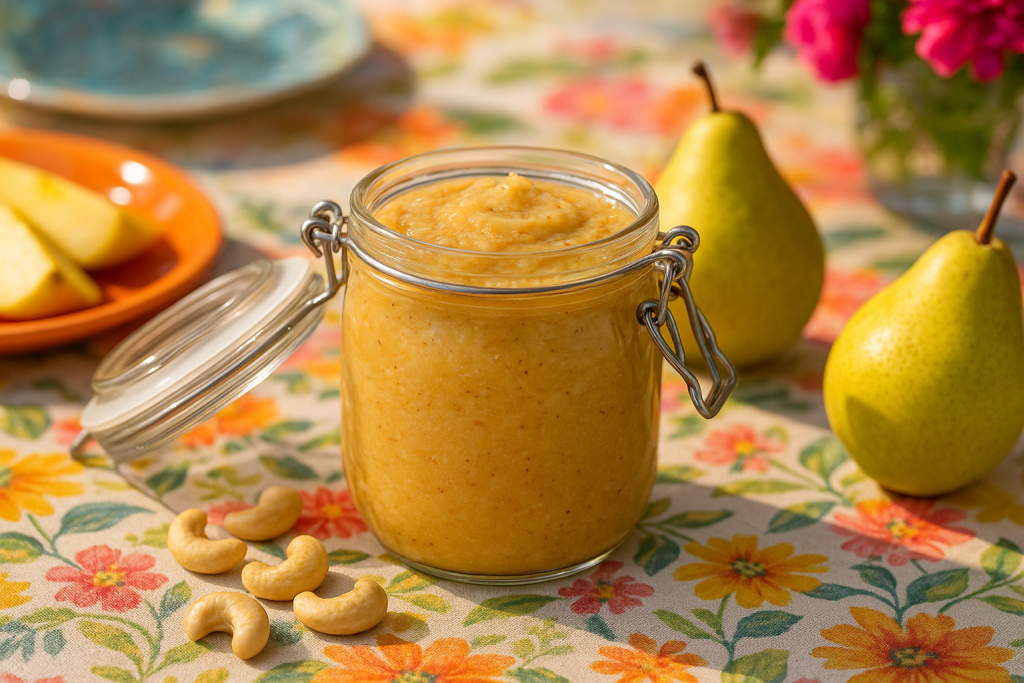
- “A glass jar of pear-cashew spread on a wooden table”
If you enable “Use Post Content,” Assistini will automatically analyze your post text and use it as the basis for the image description. This is especially useful when you want images that closely match the topic and tone of your article.
Selecting an Art Style
Art style defines the overall visual aesthetic of the image. Options may include styles such as photorealism, illustration, minimalism, or artistic rendering. For example, choosing “Photorealism” results in lifelike images with realistic lighting, shadows, and perspective.
Controlling Composition
Composition gives you control over how the image is framed. You can influence:
- Camera angle (close-up, wide shot, top-down)
- Perspective and depth
- Background and layout
This is especially helpful when creating images for specific placements, such as hero images, blog headers, or social media previews.
Adding Details and Custom Styles
The Details section allows you to refine the image further. You can specify:
- Colors and textures
- Lighting conditions and mood
- Additional elements (for example, “coconut flakes sprinkled on top”)
Assistini also lets you define and save custom styles. These reusable style presets help you maintain a consistent visual identity across multiple posts and pages.
The key rule here is precision: the more concrete and specific your description, the closer the final image will be to your original vision.
See more examples for advanced image prompts below.
2. The Image Editor: Edit Existing Images with Text
While the Image Creator focuses on new visuals, the Image Editor is built for modifying images you already have. Instead of using complex editing tools, you simply describe what you want to change.
What to Change
Start by clearly defining the type of modification you want to make. Common examples include:
- Adding new elements
- Removing unwanted objects
- Replacing one element with another
- Adjusting colors, lighting, or sharpness
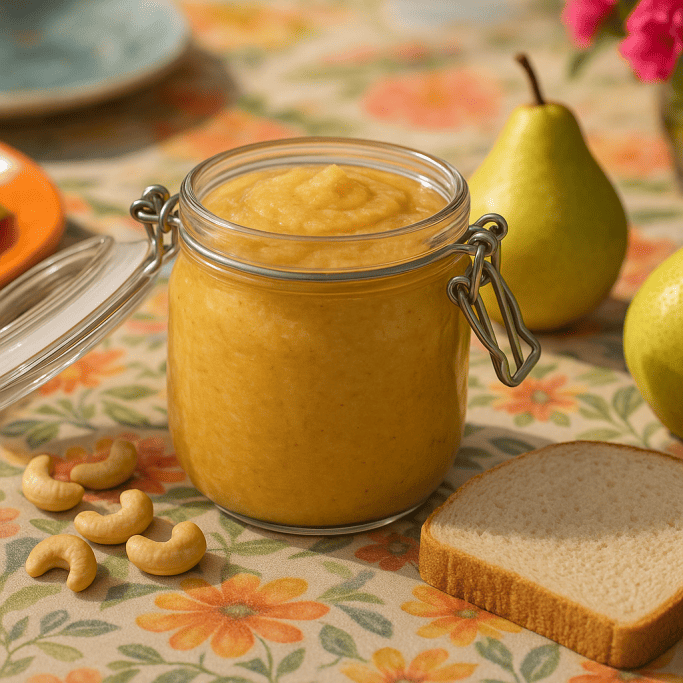
For example: “Add a slice of bread next to the jar.”
Where to Change
Whenever possible, specify the exact area of the image that should be edited. This helps the AI apply changes more accurately. Examples include:
- “Top-right corner”
- “Background only”
- “Foreground object”
How to Change
Finally, describe how the change should look. You can define:
- Style and visual tone
- Size and proportions
- Color adjustments or effects
Examples include: “Make the background white and brighter” or “Sharpen the texture of the spread.”
Clear, precise instructions ensure that edits look natural and remain aligned with your original intent.
Step-by-Step: How AI Image Generation Works in WordPress
Using AI images in WordPress with Assistini is designed to be simple and intuitive.
- Open the WordPress post or page you want to work on.
- Click the red “Assistini” button in the top bar.
- Select “Image” from the menu.
- Choose between the Image Creator (for new images) or the Image Editor (for existing images).
- Enter a text description or use your post content as the base.
- Add additional style details, select size, quality, and output format.
- Generate the image and review the result.
Once the image is ready, you can download it or save it directly to your WordPress media library, making it immediately available for use in your content
What Makes an Effective Image Prompt?
Writing strong prompts is one of the most important skills when working with AI image tools. A well-structured prompt leads to better, more predictable results.
- Be Specific: Include concrete details such as colors, lighting, materials, and style. Vague prompts often lead to generic images.
- Use a Simple Formula: A proven structure for image prompts is: Subject + Style + Details
Example: “A professional businessman in a modern office, natural window light, photorealistic capture.” - Stay Focused: Avoid overloading your prompt with too many ideas at once. Focus on the most important elements and refine gradually if needed.
- Practical Advice: Define one or two consistent image styles (e.g. clean illustrations or realistic photos) to keep your site visually coherent.
Examples for Professional Image Prompts
Example 1:
The Scenario: You are writing an article about “Remote Work Productivity” and need a high-quality, custom hero image that isn’t a cliché stock photo.
Using the Image Creator, you can use a formula like Subject + Style + Details:
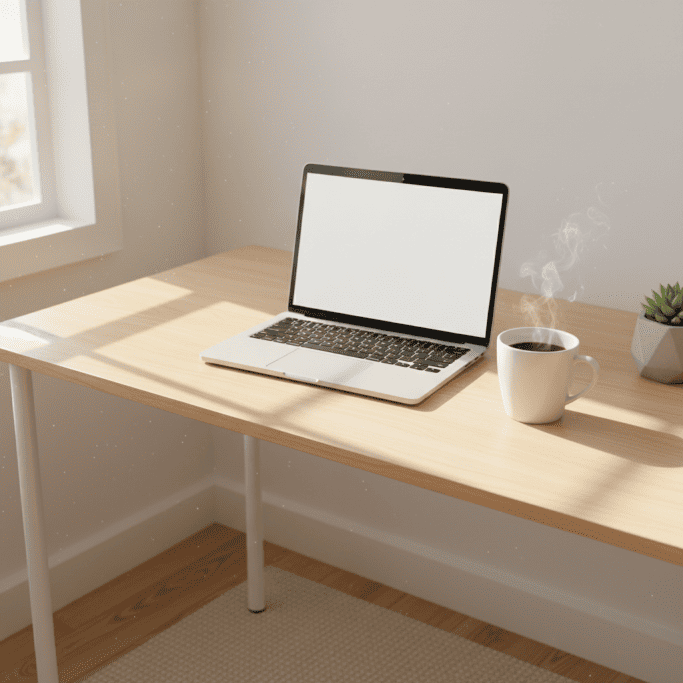
- Prompt: “A minimalist home office setup with a laptop, a steaming cup of coffee, and a small green plant, soft morning sunlight through a window.”
- Engine & Style: Choose Gemini for detail rendering and set the style to Photorealism for a lifelike, professional look.
- Pro Tip: Enable “Use Post Content” so Assistini can automatically analyze your text and ensure the generated image matches your specific topic.
Example 2:
The Scenario: Take a look at our blog post on Beyond Writing: Turn Your WordPress Dashboard into a Full-Scale Content Creation Engine with AI. The aim was to create an image illustrating the key elements of the content.
Image instructions:
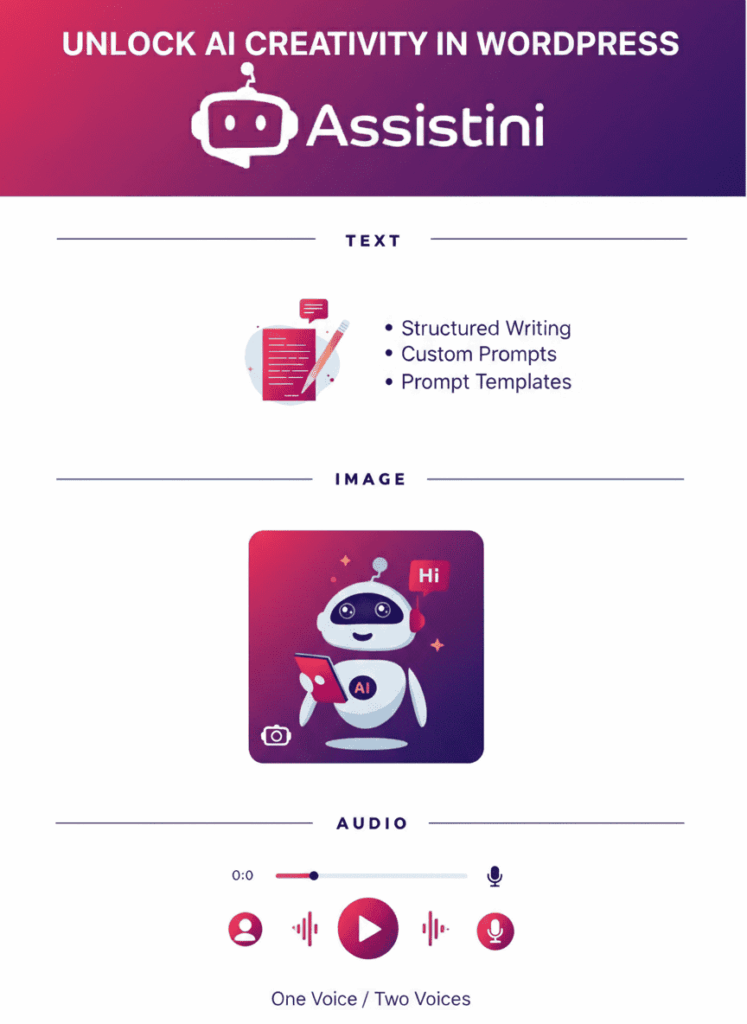
A professional and clean infographic-style layout to illustrate the key elements of this blog post. At the top, a bold header reads “Unlock AI Creativity in WordPress” against a vibrant gradient background of deep violet and bright magenta. Below the header, three distinct sections are organized horizontally:
- TEXT: Featuring a stylized document icon with a pencil, accompanied by bullet points: “Structured Writing”, “Custom Prompts”, and “Prompt Templates”.
- IMAGE: Showing a friendly, modern white AI robot character holding a digital tablet, surrounded by floating icons representing photography and creative editing.
- AUDIO: Displaying a sleek waveform and a play button, with the text “One Voice / Two Voices” underneath.
Style instructions:
- Style: Flat vector illustration with modern UI/UX design elements.
- Colors: Use a color palette of deep navy blue (#1B1464), magenta-pink (#F5365C), and soft light blue accents.
- Composition: Centered, symmetrical, high-resolution, with sharp lines and professional typography.
Why This Prompt Works
- Structured Hierarchy: By explicitly naming the sections (Text, Image, Audio), you guide the AI to organize the features logically, just like your workflow.
- Specific Details: Including specific UI elements like “waveforms” and “document icons” ensures the visual represents digital content creation rather than generic art.
- Brand Consistency: Defining the hex-style colors and the “friendly AI robot” keeps the imagery aligned with the professional yet accessible Assistini brand voice.
Example for an Advanced Image CI Style Prompt
To help you generate a high-quality, professional brand visual for your blog, here is a detailed example style prompt you can adapt and save as your default style within the Assistini Image Creator.
1. Visual Foundation
- Art Style: Select Flat Illustration or Modern UI/UX.
- Composition: Set to “Centered & Symmetrical” with a “Wide Shot” camera angle for header-style images.
2. Brand Color Palette
- Primary Colors: Deep Navy Blue (#1B1464) and Magenta-Pink (#F5365C).
- Accent Colors: Light Blue (#D8E6F2) for backgrounds and highlights.
- Lighting: “Vibrant & Professional” with clean gradients.
3. Recurring Elements
- The Hero: Always include the “Modern White AI Robot” to personify the Assistini co-pilot.
- Iconography: Use stylized symbols for Text (document/pencil), Image (camera/tablet), and Audio (waveforms/play button).
Save your style prompt, e.g., as Pro Content Creator.
How to Apply a Style Prompt in Assistini
Once you have saved these settings, your workflow for a new post becomes incredibly fast:
- Open Assistini: Click the red button in your WordPress top bar to open the Editor Assistant and select “Image Creator”.
- Select Style: Pick your saved “Pro Content Creator” template.
- Define Subject: Enter your specific image instructions for your post topic (e.g., “AI SEO Tips”).
- Generate: Assistini will blend your new topic with your saved brand colors and robot character automatically.
Practical Tip for Scaling
If you have an older post that needs a visual refresh, use the Image Editor with this same style template to “Add a podcast play button” or “Change background to brand magenta” to instantly align old content with your new look.
How Long Does AI Image Generation Take?
Image generation and editing times can vary depending on the complexity of the request, the selected AI engine, and the level of detail in the prompt. Simple images are usually created quickly, while more complex scenes may take longer.
Once the process is complete, you’ll be able to review and save the result immediately.
Final Thoughts: Image Generation by Text
AI image creation and editing with Assistini transforms how visual content is produced in WordPress. By combining powerful AI engines with an intuitive interface and text-based controls, Assistini enables faster workflows, greater creative freedom, and consistent visual quality.
Whether you’re generating new images from your content or refining existing visuals with simple instructions, mastering prompts and understanding the available options will help you get the most out of AI-powered images for your website.
Ready to take your image creation to the next level? Install Assistini today and start experiencing effortless, high-speed writing and image generation right inside your WordPress dashboard.

Melanie Tamblé ist Mitgründerin und geschäftsführende Gesellschafterin der Adenion GmbH, seit 2000 ein Pionier in Business Software Solutions. Als Expertin für Online Marketing und Digital Business führt sie nun die Integration von KI in digitale Workflows an. Mit dem Assistini KI Portfolio für Unternehmen bietet die Adenion smarte Tools für KI-Wissensdatenbanken, smarte Entscheidungsprozesse, Compliance Audits und Content Creators.